Advisors: Alex Ying Chen, Bojana Coklyat, Sky Cubacub, Dawn Koceja, and Emmanuel Von Schack
Download a PDF version of this guide.
Introduction
Over sixty million adults in the United States, or one in four Americans, live with a disability. And yet, more than thirty years after the passage of the Americans with Disabilities Act, many museums still struggle to truly embrace accessibility and shed legacies of ableism and exclusion. These guidelines offer recommendations and resources to aid museums in incorporating universal design principles and accessible approaches into their communications.
Universal design is the “design of products and environments to be usable by all people, to the greatest extent possible, without the need for adaptation or specialized design.” It anticipates a diverse user base that includes people with disabilities and seeks to create offerings that are equitable, flexible, intuitive, and straightforward. It prizes aesthetics as well as usability and offers a useful framework and series of principles that can yield more inclusive outcomes.
The term was coined by Ron Mace, a pioneering architect and advocate. In his last speech before his passing in 1998, he acknowledged: “I’m not sure it’s possible to create anything that’s universally usable. It’s not that there’s a weakness in the term. We use that term because it’s the most descriptive of what the goal is…” While full, universal “access” may never be truly achievable, it remains the goal of universal design and a laudable goal for our museums. Universal design asks us to move beyond compliance, to center the needs of those who are often excluded or marginalized, and by doing so create offerings that work better for all people. So many approaches and innovations designed to meet the specific needs of people with disabilities have myriad benefits beyond their intended audience—just think of the ways captioning, voice recognition, and automatic door openers have permeated daily life. Simply put, inclusive design is good design.
These guidelines synthesize and summarize recommendations and established best practices for making print and digital communications accessible to users with a variety of disabilities. They are designed with four primary categories of accessibility in mind: visual, auditory, physical/motor, and cognitive/intellectual. The goal is to present information in ways that can be perceived and used by people with different communication needs, who may be using different assistive technologies to engage with materials. In turn, this can open the door to greater participation and agency for people with disabilities in cultural institutions, as key members of our audiences, staff, boards, and larger communities.
Barriers to participation for people with disabilities are not inevitable—they exist by design, whether intentionally or unintentionally. And by allowing those barriers to persist and creating new ones, we exclude a huge number of people from full participation in our institutions and our society. These guidelines can help organizations avoid common practices that create and reinforce barriers to participation for many people with disabilities. That said, it’s important to remember that accessibility solutions are not one-size-fits-all, and access is never “done.” What works for one person with a disability might not work for another, and both accessibility and technology will continue to evolve. Museums can and must make a continuous and earnest commitment to learning about and embracing inclusive practices while seeking feedback and involvement from their communities.
Here are some universal design principles for communications:
Printed Materials
Font and font size
- Use a minimum twelve-point font size for standard printed materials and minimum sixteen-point font size for accessible large-print documents (see Alternative Formats below).
- Use sans serif and slab serif fonts over serif fonts in most cases, as large serifs can change the shape of letters and make them appear connected (serif fonts have decorative lines or tapers attached at the bottom; sans serifs do not). The Smithsonian Guidelines for Accessible Publication Design offer a detailed discussion of typeface characteristics that enhance accessibility.
- For body copy, use a mix of uppercase and lowercase letters, as opposed to all uppercase.
- Minimize the use of italics, which can change the shape of words and often appear with lighter line weight, making them harder to read. Boldface can enhance legibility.
Layout
- Align text blocks to the left with a ragged right edge.
- Avoid the use of columns and full justification. While full justification may appeal aesthetically for its uniform flush edges, this style makes the spacing between letters and words in every row of text different, making it more difficult to read.
- Present text in a clean format without visual clutter. Use white or blank space around the text to minimize clutter and group-related content.
- Use readable spacing between words and individual letters. Default settings for word and character spacing on standard word processors are generally accessible. For reference, kerning, or the spacing between characters of text should be around 35 percent of the average letter width. Spacing between words should be 3.5 times the inter-letter spacing. Leading, or space between vertical lines of text, should be proportional to inter-word spacing; 1.5x/150 percent is preferable.
Printing
- Use a high color contrast between text and background, with a recommended minimum of 70 percent contrast. Select a paper stock, background colors, and type colors with contrast in mind. A free downloadable color contrast analyzer for Mac or Windows is available. The analyzer features an eyedropper tool that allows you to select and compare color samples from text and background.
- Do not use color alone to convey important information, as not everyone can perceive color. Use text labels, underlining, icons, patterns, and other means in addition to color to convey information.
- Use matte paper stock to reduce glare.
- Ensure folded brochures are easy to fold and unfold.
Alternative Formats
Large Print
Like so many accessible formats and accommodations, large print can have benefits for all audiences, not just those with low vision. A 2020 study, Advancing Literacy with Large Print, for instance, found that large print decreased student anxiety around reading while increasing focus, comprehension, retention, and enjoyment. Creating a large-print document is more than just enlarging an existing document or publication, but it is a straightforward process using basic word processing software:
- Use a sixteen-to-twenty-point sans serif font (Arial, Helvetica, and Tahoma are good commonly available options).
- Set spacing between lines at 1.5 at least, with double spacing between paragraphs.
- Left-justify text (for languages that read left to right).
- Use a matte finish paper that is no less than a twenty-pound bond, to reduce glare and prevent bleed-through.
- Use a high color contrast between text and background, with a recommended minimum of 70 percent contrast. Some people with low vision prefer dark text on a light background, while others prefer light text on a dark background. Pastel, cream, or off-white paper provides high contrast with dark color inks while creating less glare than bright white paper.
- Avoid using saturated colored fonts and italics, which can diminish legibility. Underline, bold, and asterisks can be used to indicate emphasis.
- Use mixed-case text, with both uppercase and lowercase letters in both headings and body text.
- Do not overlay text, images, tables, and graphics.
- Print and bound large-print publications so that pages can lay flat, with ample margins to accommodate the binding (for example, spiral binding).
Braille
Braille is a tactile lettering system consisting of raised or embossed dots that can be read with the fingers. Not all people who are blind or have low vision read braille, but for some, it is an effective and preferred accessible format.
- Keep in mind that braille materials tend to be lengthier and require more space than common printed text.
- Whenever possible, have braille products professionally transcribed and produced. The Library of Congress maintains a directory of braille producers across the US. You may also find local organizations that can transcribe text to braille for your organization and print braille documents using an embosser.
- When professional transcription is not possible, you may consider a braille transcription software like BrailleBlaster, a free program developed by the American Printing House for the Blind. The American Foundation for the Blind offers tips for using braille translators.
- Consider using tactile production techniques to create and incorporate accessible graphics, such as maps and diagrams.
- Consider comfort and usability in how people who are blind or have low vision will locate and access braille materials. For example, if exhibit labels are not always in standard locations, installing braille labels alongside text labels may force users to search for them, making finding them inaccessible. Instead, make braille materials available upon request as an alternative format to take along during their visit.
- Provide a list of braille and tactile accommodations available on your organization’s website.
- If you offer take-home printed text materials (such as brochures, programs, or agendas) to sighted visitors, be sure to produce enough braille materials for users to take accessible versions home with them too.
Content
Inclusivity is not just a question of accessible formatting—it is also a matter of content. Include relevant information about accessibility accommodations throughout a visit and use appropriate terminology and icons to increase inclusion. Adopt a friendly, welcoming, and empowering tone when describing accessibility and accommodations.
Disability Language
Language is nuanced, personal, ever-evolving, and important. Language relating to disability differs around the world and even within communities. Stanford University’s Disability Language Guide offers guidance on both etiquette and preferred contemporary terminology around disability, including a discussion of person-first and identity-first language.
Plain Language
Plain language is straightforward, non-academic language that is designed to be easily understood. This makes it more accessible for young people, people with intellectual and developmental disabilities, and people who are less fluent in the language at hand. Using plain, direct language makes the text more inclusive for people with a wider range of reading levels. For more on the need for accessible, plain language in museums, read this edition of the Plain Language at Work newsletter.
Here are some basic principles of plain language:
- Use short, active sentences and a conversational tone.
- Organize information so that it flows logically.
- Avoid highly technical terms and jargon.
- Break information up into short sections and use headings to help readers understand and predict the content.
- Use bullet points and numbered lists to break ideas down and guide the reader.
For an example of plain language, see this edition of Disability Visibility: First-Person Stories from the Twenty-First Century, a collection of essays and personal stories from disabled, chronically ill, and neurodivergent people, edited by Alice Wong and translated into plain language by Sara Luterman.
Accessibility Information
- Include up-to-date accessibility information on your website, in promotional materials, and in program descriptions. For events, this might include specific information about content, duration, seating options, physical accessibility, sign language interpretation, captioning, availability of assistive listening, presence of scents in the atmosphere, lighting and sound conditions, bathroom availability, and instructions for how to access available accommodations. Sharing relevant details about an experience in advance helps people plan, manage expectations, reduces anxiety, and improves the quality of the experience.
- Make sure to include contact information so that patrons with questions or concerns can reach a staff member directly, via phone or email. Offering multiple methods to contact staff increases accessibility.
- Be honest and transparent about access barriers at your institution. For example, if your venue does not have an accessible restroom or assistive listening system available, it is important for patrons to know this in advance so that they can make an informed decision about whether to attend or how to best meet their needs.
Symbols
- Use access symbols in publications, promotional materials, and websites, when appropriate. The Graphic Artists Guild provides downloadable disability access These standardized, high-contrast icons help users locate services and accommodations. Additional versions of internationally recognized icons, including more contemporary versions of the wheelchair access symbol, are also available.
- Combine symbols with text describing the specific accommodation or service, not the people who might use it. For example, “Ramped Entrance” may accompany the wheelchair symbol.
Identity and Representation
Representation matters. Consider whether people with disabilities are represented in (and helping to create) your marketing and communications materials and programming.
When creating alt text, image descriptions, and audio descriptions, always use “person” and do not refer to gender, race, etc. For example, write “a person wearing a blue shirt” rather than “a woman wearing a blue shirt.”
- Avoid misgendering people and take care to use their correct pronouns.
- Avoid making assumptions or guessing about how people identify.
Electronic Documents
Word Documents
An accessible electronic document is one designed to be compatible with a variety of assistive technologies (screen readers, zoom tools, keyboard navigation, and more) and to make documents generally easy to navigate. Fortunately, the tools needed to make an accessible document are standard features in common word processors like Microsoft Word, Google Docs, and Pages. By using the built-in features properly, you can ensure that your documents will be more compatible with a variety of assistive technologies. It is important to make both internal and public-facing documents accessible, to help make your museum a welcoming place to visit and to work—including for full- and part-time staff, contract workers, volunteers, vendors, presenters, and performers.
File Name
Save as a .docx file with a descriptive file name. This will help users to locate, identify, and open the document.
Headings
Use the “styles” menu in your word processor to define different levels or categories within the document, such as the title, section headings, sub-headings, and so on. These headings function much like an outline of the document, organizing and breaking up content so it is easier for users of assistive technologies to find information. Simply bolding, underlining, or enlarging text to define sections does not have the same effect as applying a screen-reader-compatible heading using the styles menu. You can customize the look of styles while still preserving their accessible features.
Lists
Use the built-in bullets, numbering, or multi-level list features to create lists. These tools let the screen reader know that the sequence is a group of items and defines the relationship between the items. Additionally, lists are often more legible than large paragraphs of text and more accessible for people with cognitive, intellectual, and developmental disabilities (also known as IDD) or who have different reading levels.
Hyperlinks
If you include hyperlinks within a document, place them on unique text written in natural descriptive language that conveys relevant information about the destination of the link. Screen reader users often tab through links and headers when they are browsing and should be able to understand what the link does by reading the link text alone.
Example of accessible link text:
You can find an example of an accessible document here, and an example of an inaccessible document here.
Example of inaccessible link text:
You can find an example of an accessible document here, and an example of an inaccessible document here.
Columns
If you are using columns to present and organize information in your document, use the built-in “columns” feature rather than creating the appearance of columns using tabs or spacing manually. The columns feature will enable screen readers and other assistive technologies to read the text in the proper sequence.
Alt Text
For any images that appear in the document, add alt text, and a brief description that conveys the content of the image to users who may not be able to see it. To add alt text to an image in a Word doc, right-click on the image and select “Edit Alt Text.” For more information, see Alt text.
Languages
Identify distinct languages within your text to enable the screen reader to properly identify and pronounce words. Under the “Review” tab in Microsoft Word, select the “Language” button and set “Proofing Language” from the submenu.
Text Boxes
Check that text boxes are in line with text to ensure that assistive technology can read the content. Select the object then go to “Page Layout” -> “Arrange” -> “Position” and select “In Line with Text.”
Contrast
Ensure that color combinations meet the recommended contrast levels for web accessibility. You can use a free downloadable color contrast analyzer for Mac or Windows to help with identifying contrast issues. The analyzer features an eyedropper tool that allows you to select and compare color samples from text and background.
Accessibility Checker
Microsoft Office comes with a built-in accessibility checker that scans documents, spreadsheets, and emails for issues that may interfere with assistive technology or diminish accessibility. The checker is available under the “Review” tab and can also recommend actions to fix issues. You can also set this tool to continuously check accessibility while you work.
Creating an Accessible PDF
A PDF, or portable document file, is a commonly used file type that preserves document formatting and looks the same on almost any device. If not formatted properly for accessibility, PDFs can be completely inaccessible to a screen reader, essentially appearing as an unreadable image with a wall of text. Here are the formatting steps to be aware of:
Source Document
To begin with, make sure the source document you are saving as a PDF is accessible, using proper headings, alt text, links, etc. as described above. Then, when saving it as a PDF, select “Options” and ensure that “Document structure tags for accessibility” is selected.
Tags
Use tags to mark the source code of the PDF and convey information about the structure, like headings and lists, making it possible for screen reader users to navigate the document.
Alt Text
For any images that appear in the document, write alt text, a brief description that conveys the content of an image to a user who may not be able to see it. To add alt text to a PDF in Adobe Acrobat, use the “Set alternative text” command in the accessibility tool. For more information, see the section on Alt text below.
Accessibility Tools
Adobe offers an Accessibility Checker tool for PDFs, which can help flag common accessibility issues. Adobe’s OCR tool, short for Optical Character Recognition, can extract text from a scanned document or image, making it readable by a screen reader. Adobe offers additional training and tools for improving PDF accessibility on its website.
Website Accessibility
Websites are among the most important public-facing communication tools for museums, and they should be accessible to people with disabilities. But for many people, thinking about web accessibility can seem daunting, especially when there is not an easy “one-size-fits-all” solution.
For guidance, the best place to start is the Web Content Accessibility Guidelines (WCAG) published by the Web Accessibility Initiative of the World Wide Web Consortium (WC3), the main international standards organization for the internet. You can think of WCAG compliance in much the same way you would think about ADA compliance for physical spaces. Whether you build your own website, use premade templates, or contract someone to build a web presence for you, you will want to adhere to WCAG standards. Here are some things to know about the standards:
- Guidelines and best practices are always changing. Always make sure you are referencing the most up-to-date WCAG standards.
- There are three levels of WCAG conformance: A, AA, and AAA. AAA is the best practice, but AA is acceptable. Level A generally means that many users with disabilities will find a site difficult or impossible to navigate.
- When working with contractors or external companies to build or update your website, always include access requirements in the scope of work. Accessibility expert Sina Bahram offers guidance for museums on how to procure digital services with accessibility in mind.
- Using a template to create your website? Pay attention to its accessibility features. If there is no mention of accessibility, it probably will not be accessible. Deque offers a guide for selecting and creating accessible themes in WordPress. If you notice that a website template has some inaccessible features, it’s a good idea to contact the service via Twitter, email, or some other means to report it—the more people who report it, the more likely the service is to address it.
The following access recommendations consider the experiences of people who:
- Are blind or have low vision and may be using screen readers or magnifiers to engage with content.
- Are Deaf or hard of hearing and may need to access audio content in visual or text formats.
- Have physical or motor disabilities and may navigate using a keyboard or other adaptive interface rather than a mouse.
- Have intellectual and developmental disabilities and may benefit from clear, consistent, easy-to-navigate sites with tolerance for user error.
However, the design approaches that benefit individuals in these categories, from captioning to alt text, generally improve usability for all.
Navigation
Use clear and consistent navigation throughout your website, including the main navigation buttons at the top and bottom of your page. Just like “clear paths of travel” are important for physical access, barrier-free navigation is important in the virtual space, as many people may be using adaptive tools to navigate your webpage.
Headings
Just as with documents, use headings on web pages to organize content and convey the hierarchy of information on a page, making it easier to navigate. Headings enable screen reader users to scan the page for relevant information. They should be distinguished visually (using attributes like font, size, and bolding) as well as with the HTML heading tags.
Hyperlinks
Label hyperlinks with natural, specific language. You want to cue the user into where the hyperlink will take them, rather than using vague or generic labels like “click here.”
Language
Specify the default language in the HTML code so browsers and other applications know how to deliver the most appropriate information to the users of your webpage.
Color
Use strong contrast between color combinations, which is important for legibility for all users. In web design, color contrast is often expressed as a ratio between two colors. WCAG guidelines require a minimum contrast of 4.5:1 for normal text and 3:1 for large text. This includes hyperlinks, which may change color but should retain the same level of contrast after they have been clicked. WAVE or Colorable are free web accessibility evaluation tools that can check for contrast levels.
In addition to color contrast, remember to consider color perception when selecting a color scheme and designing user experiences. As not all users can perceive color, do not convey important information through color alone (for example, with tabs that only change color when selected, or links only indicated by color).
Design
Many of the same design principles for accessible text documents apply to web design:
- Design your site to be well-organized and clear of clutter, with open space between design and navigation elements.
- Use a minimum sixteen-point font size.
- Use sans serif and slab serif fonts in most cases, as large serifs can change the shape of letters and make them appear connected.
- For body copy, use a mix of uppercase and lowercase letters.
- Minimize the use of italics, which can change the shape of words and often appear with lighter line weight, making them harder to read. Boldface may enhance legibility for certain fonts.
- Align text to the left.
- Avoid layering text over images.
Screen Magnifiers
Design your site to behave well when zoomed in to at least 200 percent so that visitors who use magnification software or optical zoom to enlarge your page can see it. You can use responsive design to allow elements on the page to shift in response to the size and shape of the browser window, and it generally supports text-based zoom as well.
Keyboard Navigation
Ensure all site functionality and content are operable via keyboard navigation, as some users will navigate your site without a mouse. There should be a visible on-screen indicator showing where a keyboard user’s focus is at any given moment. This is usually styled with a different colored outline around interactive elements—for example, a light blue outline around a purple button. Avoid custom-shaped cursors, which may impede functionality and make navigating the site more difficult, particularly for users with disabilities.
For both screen reader and keyboard users, provide a way to bypass repeating elements, such as a long table of contents that is present on all web pages, to skip to the main content. Otherwise, screen reader keyboard users must tab through each element every time they visit a page. Often called a skip link, this is usually the first focusable element on the page.
Alt-text
For all images and graphic elements on a page, from a button that reads “menu” to a photograph from a museum’s collection, write alt text, a brief description that conveys the content of an image to a user who may not be able to see it. Alt-text is an HTML attribute that screen readers will read aloud as part of the experience of navigating a website, or that may be displayed when an image is not available. It is an essential component of web and digital accessibility.
Style
Write alt text to be clear, concise, and specific. The Cooper Hewitt offers Guidelines for Image Description with tips and examples for how to craft a variety of styles and formats of descriptive texts. The Museum of Contemporary Art Chicago also offers a set of Guidelines for Describing, a supplement to the seminal Guidelines for Verbal Description developed by Art Beyond Sight. Alt Text as Poetry, a project by artists Shannon Finnegan and Bojana Coklyat, offers a thoughtful guide, resources, and a free workbook to elevate and hone your alt text authoring.
Length
- Do not begin an alt text description with “Image of” or “Picture of,” as a screen reader will already identify that there is an image on the page.
- Keep alt text brief and focused on the visual information in an image. Lengthy alt text can interrupt the flow of content for a screen reader user. For most images, try to stay under 125 characters, but for complex or significant images you may use longer descriptions of one to three sentences.
- When an image has a functional purpose as a link or button, use the alt text to indicate the function of the image.
- When the content of a page describes an image in detail (for example, in an article about an artwork) you can use the alt text to reference the longer description in the body rather than repeating information.
Image Descriptions
Enabling people to explore and engage with objects and images is central to what museums do. While embedded alt text descriptions are necessarily brief, you may include longer image descriptions elsewhere on your site to convey additional information about significant or complex images, such as collection objects.
- When describing a complex image, try starting with the general and moving into the specific.
- In a few sentences, aim to provide specific information about the subject (who or what is in the image), the setting or context, the medium, style, technique, and other relevant details.
- Distinguish between description, which aims to objectively represent the visual elements of an image, and interpretation, which aims to describe its meaning.
- To achieve a consistent institutional tone and style for image descriptions, provide comparable training for all staff who will be writing them.
- Do not try to write a “complete” image description, as images can be infinitely described. Instead, focus on what is most important and keep alt texts concise.
Accessibility Check
- Conduct accessibility testing for your website. Remember that there are multiple types of screen readers available and multiple ways users might experience your site (on a computer, smartphone, or tablet). A website feature may be accessible on one platform but not work well on another.
- Consult the Web Accessibility Initiative’s extensive list of software and tools to check your site’s accessibility and WCAG conformance.
Other Web Accessibility Concerns
- Consider providing a “dark mode” for your website, as some individuals are sensitive to light.
- Avoid flashing animations and lights and patterned or imaged backgrounds.
- If a video or animation features content or flashing lights that people may be sensitive to, consider adding a warning so that viewers can make an informed decision before playing the video.
- Ensure videos do not play automatically and are equipped with clearly labeled playback controls.
- Beyond making your website accessible to people with disabilities, including images and content that represents members of the disability community and is created by people with disabilities.
Video and Multimedia
Many museums disseminate information through videos and multimedia experiences. It’s important to make sure these materials are just as accessible as the rest of your website, by making visual and auditory information available in other formats.
Transcripts and Captions
Describe or translate all auditory content from videos, sound clips, podcasts, or audio guide stops. This makes it possible for Deaf and hard-of-hearing viewers to access your media. Transcripts and captions also offer additional benefits: They make it so media can be viewed without sound, are searchable, and are more accessible for people who are not fluent in the language of the media. Depending on the kind of media, you might use one of the following options:
Transcripts
A transcript is a verbatim written translation of auditory content. It typically appears on the same page as the source material, so it is easy to locate. Unlike captions, a transcript can be read at the individual’s leisure. Transcripts work well for content like podcasts, lecture recordings, and other media where it is not essential to associate spoken content with synchronized visuals. While transcripts are very useful and important to include, they are not a substitute for captioning.
Sound Description
A sound description is a type of transcript that relays auditory content that is not spoken—for example, a description of nature sounds from a field recording. While transcripts are intended to accurately represent auditory content, sound descriptions may be more general or abstract descriptions of ambient sounds in media.
Artist Christine Sun Kim offers an insightful take on the sound description in this short video, in which she reimagines standard closed captions.
Captioning
Captions are a written representation of auditory content that displays in real-time over the media. Captions can be used to convey spoken dialogue, narration, music, and sound effects. Open captions are embedded in the video, while closed captions can be toggled on or off on the video-playing platform.
- If possible, use closed captioning on web-based videos to give individuals the choice of displaying them. Closed captions can be offered in multiple languages and can be edited more easily than open captions.
- If possible, give viewers the option to customize the caption displays to fit their screen and visual preferences. This may include adjusting the size, contrast aesthetics, and placement of text.
- Since viewers must read the on-screen text while attending to other visual information, consider legibility, speed, and design, as well as accuracy and consistency. Captioning Key, produced by the Described and Captioned Media Program, is a comprehensive resource that offers guidance on how to produce quality captions.
- Remember: although subtitles may seem like captions, they actually are not intended to represent auditory content in the same way. Subtitles function to translate dialogue into another language than what was originally spoken. For more, see “Language Access.”
Audio Description
An audio description is a synchronized audio track that plays over visual content and offers essential information about on-screen action, to enhance viewing for people who are blind or have low vision. These are usually created after production, but some art and performances have audio descriptions integrated as part of the works themselves. For instance, you can view an audio-described artwork by Mika Rottenberg as part of an exhibition presented by MCA Chicago.
Here are some tips on creating audio descriptions:
- Write the description to be clear, concise, and accurate.
- Ensure the description complements rather than competes with the original soundtrack. It should usually play in between dialogue and narration, providing details about the action and images on-screen.
- Focus primarily on the actions that are happening on screen. Remember that audio description is intended to provide context for visual information and action.
- Limit environmental description to instances when a scene transitions to a different location or when it is important to the actions taking place. Likewise, limit descriptions of objects to when they are relevant.
- When possible, verbalize on-screen credits and captions.
- Like closed captions, allow the user to toggle the description on and off.
American Sign Language
American Sign Language (ASL) is a complete, robust natural language that is one of the primary languages of many Deaf and hard-of-hearing individuals. Not all ASL users are proficient in written English, so you may wish to include ASL video content, such as tours or introductory videos, on your website to improve communication and engagement with members of the Deaf community.
The Whitney Museum of American Art’s ASL Vlog Project, the Metropolitan Museum of Art’s ASL video series, the Nelson-Atkins Museum’s ASL Tours, and the Smithsonian American Art Museum’s Art Signs series are all examples of museums making their content and programming more accessible through ASL video.
Before jumping into an ASL project, you should be aware of a few things. First, not all non-hearing people are fluent in ASL, and sign languages differ between countries, regions, and subcultures. Consider your target audience and how best to meet their communication needs with sign language, captioning, and spoken content. Second, it is important to engage and work with Deaf ASL users when producing ASL materials.
CART
Communications Access Realtime Translation, more commonly known by the acronym CART, is simultaneous captioning done at a live event (whether in person, online or on live TV). CART helps people who are Deaf or hard of hearing but do not use sign language, who have trouble with auditory processing, and who are less fluent in the language being spoken.
CART is done by a trained professional with a stenotype machine that has a phonetic keyboard and software that can rapidly translate the phonetic symbols into words. It can be used for in-person programming, by displaying it on a monitor or LED display, or for virtual programming, by live-streaming it to the web.
If you are using CART for a live event:
- Talk to your provider about the technical needs of your program.
- Give your provider contextual information for your program—like a content profile, technical terminology, and proper names—in advance, to improve accuracy and reduce spelling errors.
- Be mindful of language needs and whether you need a bilingual provider.
Social Media
Billions of people around the world use social media, and it has become a powerful tool for museums to connect with their audiences. While social media platforms are third-party sites and often have inaccessible practices, cultural institutions are still responsible for ensuring that the content they post is accessible.
Alt Text
Always include alt text for images on social media. Some platforms offer auto-generated image descriptions; however, it is usually best either to write your own or to review the auto-generated descriptions and edit as necessary to ensure that they are accurate.
Here’s how to insert alt text on some of the main social media platforms:
- Click on the “Tweet” compose button or press the “n” key to use the keyboard shortcut.
- Attach your photo(s).
- To insert descriptive text, click “Add description.”
- Type your description of the image and click the “Done” To edit the description, re-open the “Add description” dialog prior to posting the Tweet. (The limit is one thousand characters.)
- Click Photo/Video at the bottom of the “Create post” screen.
- Select the photo you want to add.
- Click “Edit photo” (the paintbrush icon), then click “Alt Text.” An automatically generated text will appear on the left side of your photo, which you can override or edit.
- If writing your own, type your alt text in the open field.
- Click save on the bottom right to save your alt text.
- Go to the “New Post” icon (a plus sign in a square).
- Select the photo you want to add and click “Next.” Choose a filter and click “Next”
- Go to “Advanced Settings” -> “Accessibility” -> and click “Write Alt Text.”
- Enter your image description and click “”
Captioning
Facebook, Instagram, and YouTube all offer auto-generated captioning. If using these services, you should always carefully review and edit the captions for accuracy before publishing. You can also upload your own caption files.
- Click “Photo/Video” at the top of your timeline or news feed.
- Choose a video from your computer, then click “Post.” Facebook will notify you when your video is ready to view.
- Click the notification or the gray date and time at the top of the post on your news feed or timeline.
- Click in the top right and select “Edit video.”
- Click “Choose File” below “Upload SRT files” and select a .srt file from your computer.
- Click Save.
Facebook (Live)
- Click to create a “”
- Go down to “Settings” and click on “Viewing.”
- Turn on “Auto-generated captions.”
- Go to “Settings” and tap “Account.”
- Tap “Captions” and switch on “Auto-generated captions.”
- Turn on “Auto-captioning” in your IGTV settings too.
- Upload your IGTV video.
- Before publishing, tap on “Advanced Settings.”
- Turn on “Auto-Generated Captions.”
- Tap “Done.”
YouTube
YouTube auto-captions videos or you can add your own caption file manually.
TikTok
TikTok does not currently offer auto-generated closed captions. To caption your videos, you will have to use a third-party app like CapCut, AutoCap, and Clipomatic or manually add captions to your video by adding text to your video.
Audio Description
Social media still does not support audio description well, so it requires a lot of creative problem-solving. Here are a couple of solutions that might work:
- Upload two versions of the same video, one with and one without audio description.
- Subtly describe the most vital visual content in the main version you upload. This option works best for informational videos and can look like just reading information off the screen. However, this is a seamless integration approach rather than a true audio description.
Remember:
- Stories on Instagram and Facebook are not accessible to people who are using screen readers.
- If you are using hashtags, capitalize the first letter of every word. For example: #ArtistsForAccessibility rather than #artistsforaccessibility. This makes the content more readable, especially for screen readers.
- Filters are fun, but not all of them are accessible. Some might be dangerous or uncomfortable for people who are sensitive to flashing light effects, for instance. If you decide to post a story with flashing lights or images, add a text story with an appropriate warning. For example, “Content warning: Next story [or next two stories] have flashing images.”
Evaluation and Feedback
It’s important to remember that there is no such thing as “100 percent accessible.” While we can strive to be as inclusive as possible, the backgrounds, abilities, and needs of our audiences will vary and change. Even two people who have the same disability may have different communication needs, preferences, and styles. Access solutions are not one-size-fits-all, so openness, flexibility, and ongoing commitment are important.
Here are some tips to remain flexible and continue adapting:
- Make it a priority to continually improve and re-evaluate accessibility.
- Provide accessibility training for all staff, especially those working directly with the public.
- Utilize training and access peer groups to stay abreast of emerging best practices.
- Develop or adopt an in-house accessibility manual or guidelines for your institution. This can ensure consistency and accountability and empower staff at all levels of the organization to incorporate accessibility into their work.
- Embed accessibility into workflows and procedures so that it does not get overlooked. It should be a well-integrated priority in communications and design processes.
- Build relationships with an array of community members, stakeholders, and advisors with disabilities. Your board, staff, and audience should include people who identify as disabled.
- Invite and welcome feedback from your audience and stakeholders about what’s working well and what isn’t. Include clear contact information on your website. If someone has a question or concern, it’s important for them to know who to contact, via phone or email.
Upcoming Events
-
Planning and Budgeting for Fundraising Success – OMA Webinar
Event Date:Presented by: Ohio Museums Association -
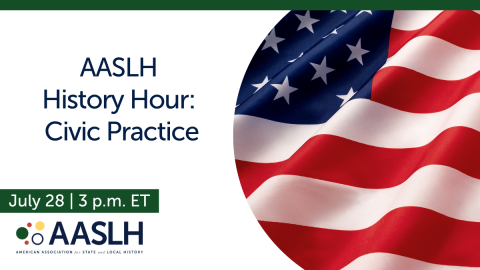
AASLH History Hour: Civic Practice
Event Date:Presented by: American Association for State and Local History (AASLH) -
What It’s Like to Participate in Museums Advocacy Day
Event Date:Presented by: American Alliance of Museums -
From Idea to Acceptance: How to Submit a Winning Annual Meeting Session Proposal
Event Date:Presented by: American Alliance of Museums