A Comprehensive Tipsheet to Thoughtful Curation, Engaging Exhibits, and How to Limit Headaches When Bringing Museum Experiences to Life. This tipsheet was developed by Elizabeth Skrabonja of EK SKRABONJA Exhibition Design and Shawn Jeffas, owner of SpeedPro Westwood,. The information shared here is based on the best available information as of publication.
Museum exhibits serve as powerful tools to educate, engage, and inspire visitors. The success of an exhibit hinges on meticulous planning, thoughtful design, and seamless execution. In this comprehensive tipsheet, we sat down with experts across the country to delve into crucial aspects of exhibit design, execution, and installation. Drawing from decades of combined experience, this guide is designed to help museum professionals avoid major mistakes that waste time and money, and provide actionable advice to help exhibit execution go as smoothly as possible.
Mistake #1: Improper Budgeting and Resource Management
First and foremost, budget and resource management is one of the most important aspects of exhibit execution. It can mean the difference between a well-organized and flawless experience or a disjointed and unimpactful mess. Ensuring budget adherence and resource allocation requires diligent oversight and constant communication with museum directors.
Throughout the range of museum contexts, from larger institutions that may suffer from too many cooks in the kitchen to smaller ones that need to make the most of lean teams, one tip remains the same: Communication is paramount. Edward Owens, owner of SpeedPro East Bay, who has decades of experience printing exhibit components, stresses how important it is to over-communicate with each member of the team and always assign one point person to work with each vendor in order to avoid confusion that can be costly in both time and budget.
Owens emphasizes the importance of aligning all decision-makers on approved concepts before executing those elements with vendors—nothing is worse than getting to the finish line and having one board member dismiss the entire concept at the last minute.
Aside from miscommunication, here are other common mistakes that can eat up an exhibit’s budget:
- Interactives: One of the easiest ways the budget can get out of hand is with interactive elements. These add-ons can really elevate an experience, but they can also severely drive up costs. It’s common for designers to plan rooms filled throughout with interactives, only to price this out and realize they can’t afford it. To cut down on these costs, Sean Hohenstein, co-owner of SpeedPro Dayton, recommends painting one wall as an accent wall with partial graphics and having only one or two interactive elements instead.
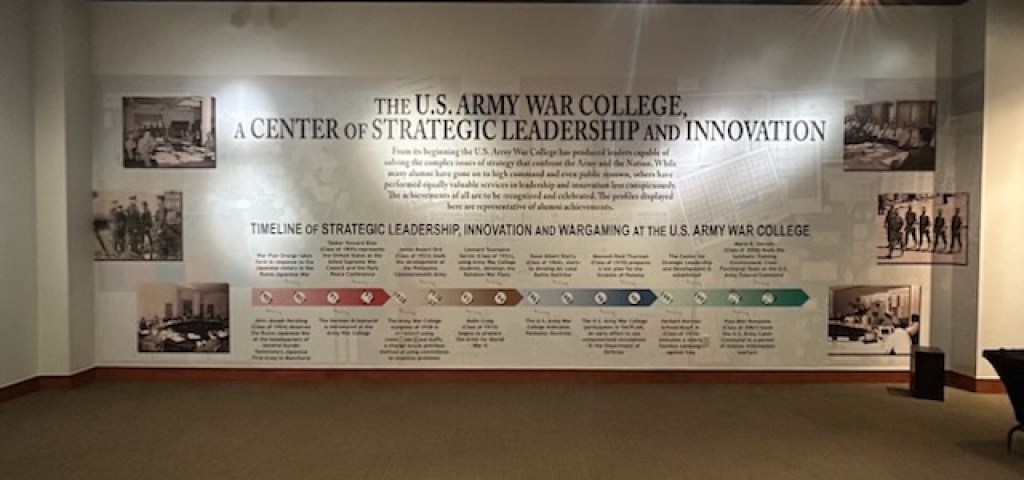
Pictured Here/Photo Credit: This is a great example of an accent wall at The U.S. Army Wall College located in Carlisle, PA. Courtesy of Dave Higgins, owner of SpeedPro Harrisburg. - Materials: The materials used to create an exhibit can impact costs significantly. In reality, you can print wayfinding instructions or a graphic display on practically any material that is flat, smooth, and up to two inches thick (think acoustical board or a door) to create more immersive experiences. However, the optimal materials you should use differ depending on the location of the visuals. For instance, if you need an exterior sign that can withstand the elements, the price of that sign will vary widely depending on if it needs to last two years or ten.
Ultimately, whether you can accomplish the look and feel you want all comes down to costs. Be sure to work with a vendor who is able to provide you with alternatives to your first choice at different price points for different materials. Provide very clear objectives on how the material will be used, how long it needs to last, and how much traffic it will need to hold up to, as these factors help your vendor select the right materials at the right price points.
- Don’t Underestimate the Cost of Vendor Interactions and Rounds of Revisions: Owens cautions to be mindful of the costs associated with changes in design, layout, or minor tweaks that result in multiple revisions with your vendor. Some vendors may charge an hourly rate for small changes, so be sure to review the proof with everyone involved and send back one cohesive document with feedback instead of multiple cycles with small changes.
Mistake #2: Omitting Buffer Time
Efficient logistics are essential for a smooth exhibit installation. A well-maintained calendar, early planning, and allowances for unforeseen circumstances are vital. Careful attention to measurements and coordinating with vendors ensures precision during installation.
- Your Calendar Is Your Greatest Tool: Planning ahead, especially if you have a small team, is the best way to manage any project. We recommend providing at least five buffer days for any given phase, and always leaving your printer/vendor with more time than they need in case they ever run late. Always make allowances for people getting sick or having emergencies and account for the possibility that work might not get done as expected. The best way to approach this is to start project components earlier than you think you need to. While we understand this advice is easier said than done, once you start thinking through all of the potential roadblocks you may encounter—and how you can easily address them—you will start implementing buffer times more efficiently. Another way to approach this is to create a pre-planned timeline that builds in at least 25 percent extra time for every step.
- Learn How to Manage Issues: There are many significant issues that can impact your project:
- Your artwork is late to the printer.
- Product shortages are causing delays in production.
- Your contractor pushed back their work dates.
- Your artwork delivery is delayed.
The reality is that issues like these arise all the time. The lesson here is learning how to pivot quickly, have backup plans for each major segment in your pre-planned timeline, and again build in enough extra time to deal with inevitable roadblocks.
- Understanding Realistic Timing for the Production of Elements: Depending on the size of your exhibit, the time from finalized ideas to fruition can vary. For a smaller project like a new vinyl sign on a single wall, you will typically need a minimum of five days for the printer to execute and install this for you. If it is a bigger project with multiple elements, you will need at least three to five weeks to get the materials finalized and installed. Keep this in mind when you are building out your timeline. Hohenstein also recommends preparing for the occasional possibility that materials will get damaged in transit, by asking your vendors if they have any policies on turnaround times for correcting damaged items.
Mistake #3: Taking Inaccurate Measurements
For an installation of any kind, measurements must be absolutely perfect. That’s why SpeedPro Westwood’s mantra is “measure twice, print once.” They strongly recommend enlisting professionals to come out to your site and measure for you. If you do the measurements yourself, and then during the installation the panels don’t line up and the exhibit needs to be completely redone, that is on you. But if you work with your vendor to conduct a detailed site visit and allow them to take their own measurements, it will be their responsibility to fix any issues if anything comes out incorrectly, not yours—saving you time, hassle, and money.
Hohenstein says that the most errors tend to happen when vendors aren’t involved in projects from the start. Getting vendors involved as early as possible means that they can help you build everything out and identify potential problems before it’s too late.
Mistake #4: Selecting the Wrong Material for the Application
There’s no one-size-fits-all solution when it comes to selecting materials for museum exhibit components. Recommendations depend on the specific project details. Vinyl, metal, and plastic-based materials, as well as acrylic and aluminum sheet metal, are commonly used, but the material you choose will depend on the durability required in addition to your budget.
For instance, if you want to add floor graphics for wayfinding purposes, you must first ask yourself a few questions:
- How many people do you expect to walk on it daily?
- How long do you want it to last (one night for a fundraising event or a few months)?
- Where will it be placed (an entryway, stairs, or a hallway)?
Having definitive answers to questions like these will help your vendor determine the adhesive type (temporary or long-term, low or high tack), and surface type (vinyl, carpet, or concrete) needed to enhance the longevity of your exhibit. If you have a floor graphic in an entryway, you need to make sure you consider slip-resistant materials like a textured laminate. Additionally, some floor graphics are designed to last longer than others. For example, general-use laminates come up easily for short-term uses (a day or a week), but if you need a longer-term solution you will need to consider a more robust option for an installation that lasts a few months.
Owens says another mistake people often make is ignoring the environmental footprint of their design decisions. Ask your vendor about sustainable products that can be recycled, composted, or reused. For instance, Hohenstein recommends printing on Falconboard because it is a recyclable material suitable for short-term exhibits that is lightweight, easy to use, and an attractive eco-friendly option.
Finally, Owens adds that your most desired materials may be costly, so you should be sure to ask about alternatives that can achieve a similar look and feel.
Mistake #5: Not Balancing Visual Cues
One mistake designers often make when conceptualizing a space is failing to balance visual cues, which can happen if they don’t immerse themselves in the materials and artifacts they are working with.
You must learn to honor your materials in their historical context, but also bring them to this century to make them feel relevant and approachable. Just because you have a piece of seventeenth-century art doesn’t mean you have to use a seventeenth-century typeface. Just because you have a piece of furniture from the 1920s doesn’t mean the entire room needs to be decorated in art deco. You can mix and match elements of old and new together to make it feel true to the concept but also modern and fresh.
One way you can accomplish this balance is by using colors that embrace the topic and create cohesiveness, but also give the visitor some agency. Your goal is to give them enough visual cues to evoke the feelings you are going for—but remember, you don’t have to go floor-to-ceiling on a theme to accomplish visual cues.
In addition, incorporating more modern elements such as screening rooms or slideshows offers a different level of connection to the artifacts. Relatability, especially through modern tech or pop culture references, enhances visitor interest. Understanding the narrative is key to ensuring a cohesive and engaging exhibit.
Mistake #6: Mishandling Artifacts
Museum designers or curators would never intentionally jeopardize the well-being of artifacts, but it does happen from time to time. As exciting as it is when the public is interested in pieces of history, we must always balance this engagement with maintaining the integrity of the objects. Protecting artifacts is paramount to preserving their value, ensuring they can be enjoyed for decades to come.
While there are gold-standard display techniques for achieving this balance, such as acrylic cases and UV-filtered glass, museums can’t always afford them, especially smaller institutions. The good news is that there are lower-cost solutions available to safeguard valuable artifacts.
If you can’t afford to purchase an acrylic case, for instance, different glass coatings can protect exhibit pieces at a much lower cost. Another option is to ask around at neighboring museums or cultural organizations to see if any of them would let you borrow higher-end equipment—they may be more willing to share than you expect. The key is to do your research, be resourceful, and above all always find the most cost-effective way to protect art and artifacts.
Mistake #7: Disconnecting Objects from Wayfinding
When there is a disconnect between the object and its supporting wayfinding signage, it is confusing for guests and misrepresents the works at hand. This kind of inadequate planning can quickly lead to a disjointed exhibit.
Another mistake exhibitors make is when they send artifact labels out to the printer without considering and finalizing the placement of items in an exhibition space, which can lead to major wayfinding challenges or visitors incorrectly identifying pieces. For instance, we’ve seen errors such as a sign that says “from the left” when really the painting was placed on the right. This disorients guests and creates a factually incorrect experience. Assess the room and the artwork or artifacts and make sure you have a finalized plan for their placement before you send labels out.
Mistake #8: Using Designs That Aren’t Print-Ready
You have a vision for each exhibit. Yet, even with the best intentions, one of the biggest mistakes exhibitors make is not having the appropriate design files to provide to the printer to bring the exhibit to life. Here are our top tips to help you through this process:
- Size Matters: The graphics you want to print need design files that are large enough and of a high enough resolution to be blown up into the size you are looking for without looking grainy. The best way to make sure you’re working with the correct resolutions is to ask for help. Ask your vendor to look at the items you have and conduct a site visit so they can help you determine what print sizes are feasible. This allows your vendor to make adjustments before printing to save you time and money.
- Designing for Print is Different Than Designing for Digital: With the advent of many free online design tools, practically anyone can create digital files. But for printed graphics, there is a level of experience and professional knowledge that is necessary to meet quality expectations, especially for large-format printing. That’s why it is important to work with a well-established vendor—they will be able to review your files and immediately discuss with you what will work and what won’t.
Mistake #9: Neglecting Accessibility
Design choices significantly impact visitor engagement, and it’s important to keep people with disabilities in mind to ensure that your exhibits are accessible to all. While there are ADA compliance standards to follow, they are not exhaustive, and it is easy to neglect them and unintentionally exclude people. Here are some reminders on how to ensure your exhibit design is accessible for all:
- Access to the Venue Inside and Out: From entryways to interiors, consider height limitations, spacious layouts for wheelchairs, the potential for chokepoints in narrow hallways, and whether or not there is ample lighting for people with visual impairments.
- Typeface Matters: Review your choices in signage, such as font size (whether it is too small to read), sign placement (if it is too high or too low), improper background colors (too bright or too dark), or poor lighting that can hinder readability and comprehension.
- Multilingual Text: If you have room in your budget, consider creating signage in many languages for all to enjoy. If this option isn’t in the budget, create a great visual experience that tells the story through the positioning of the objects without words. Additionally, auditory solutions can help people experience your exhibit without having to parse through signage or written words, which can better serve visitors both with and without disabilities.
Inclusivity creates warm and welcoming places for people from all walks of life, emphasizing the importance of factoring in accessibility and creating an enriching experience for all.
A Final Word
Successful museum exhibit design requires a blend of creativity, planning, and diligent execution. By avoiding common pitfalls and prioritizing accessibility, engagement, and object preservation, professionals can continue to elevate the modern museum experience.
A Job Well Done at the Barrymore Film Center
A Special Note from Elizabeth Skrabonja of EK SKRABONJA Exhibition Design
Photo Credit: SpeedPro Westwood
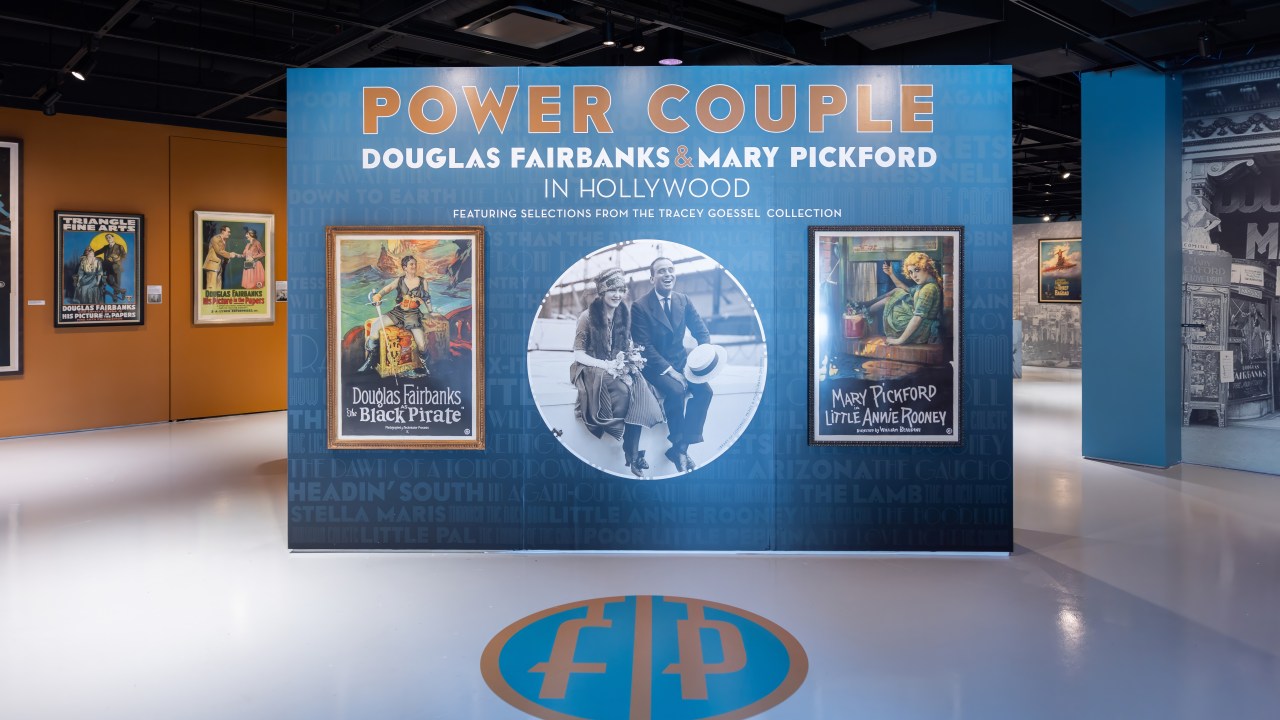
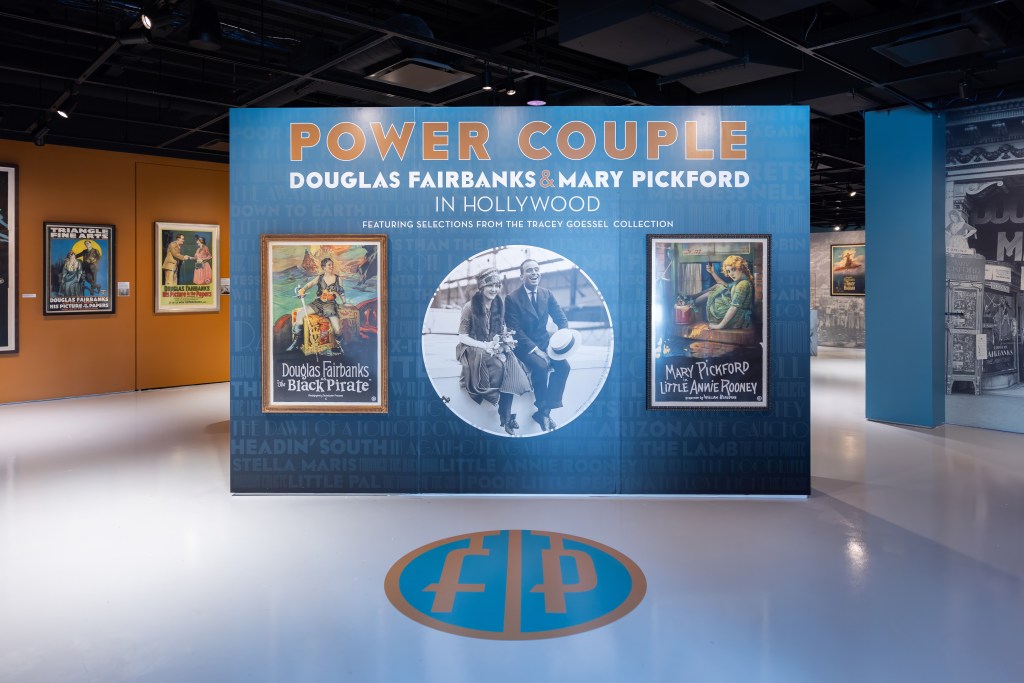
The Barrymore Film Center exhibit Power Couple: Douglas Fairbanks & Mary Pickford in Hollywood serves as a testament to a successful team effort. With a cohesive approach to narrative, color palettes, and graphic elements, the team created an immersive experience celebrating the birthplace of the American Motion Picture Industry. It is a sterling example of an exhibit well done by tapping into all nine tips.
As designers, our task was to bring the vision of the curator, in this case Dr. Richard Koszarski, a preeminent film scholar and author, to fruition. The Barrymore Film Center in the Fort Lee, New Jersey, exhibit was designed to highlight two of the era’s greatest stars—Douglas Fairbanks and Mary Pickford. The goal of the temporary exhibit was to feature how Fairbanks and Pickford had started their film careers in Fort Lee before going on to Hollywood and becoming America’s first ‘Power Couple.’ The curator was able to arrange for the loan of selections from the private collection of Tracey Goessel, the largest and most comprehensive collection of Douglas Fairbanks and Mary Pickford artifacts ever assembled.
The collection includes original framed stone lithograph film posters, original photographs, lobby cards, and artifacts as varied as the love letters Fairbanks wrote to Pickford, Pickford’s hairbrushes, and one of her famous curls. Dr. Koszarski wrote a compelling narrative that took us through the early career of these stars, highlighting their individual achievements, including the founding of the Motion Picture Academy, their romance, and their career. It was up to us to create a cohesive narrative for the visitor, highlight the original art, and stay ADA-compliant and within budget. The printer we selected for this project was Speedpro Westwood, and they were with us every step of the way.
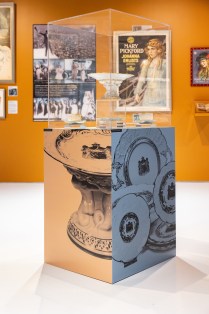
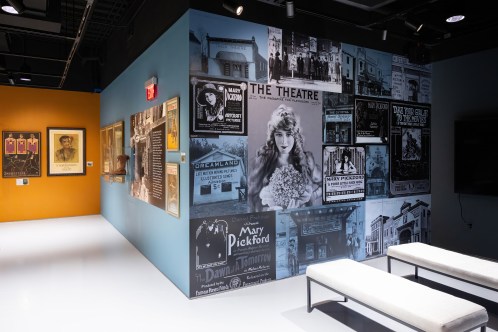
After selecting a color palette, we created a repetitive graphic element that served as a ‘wallpaper’ composed of film titles. Using a combination of various substrates, we created graphics to move the narrative along and create a rhythm in the gallery while supplying historical information with supportive visuals. For the poster labels, we were able to source digital images of early film stills from the MoMA film archives. We also created a screening nook that was reminiscent of the original ‘nickelodeons’ and faced three of our artifact displays with graphics relating to the objects.
Everything was measured twice, all of the colors were checked repeatedly, and all of the photographs were sourced for the highest quality available. Installation went very smoothly due to the meticulous files created by members of our team, Sylvia Aisenstadt, Garvin Burke, and Speedpro Westwood’s excellent installer. What was evident was that all parties were invested in the project and there was a palpable excitement that we were creating an immersive experience by supplementing the original art with our graphics. I think Doug and Mary would have approved.
The success of the project was reliant on the interplay between our design team with the Barrymore Film Center’s Director, Nelson Page, the curator, and our printer, Speedpro Westwood. Together, we made film history.
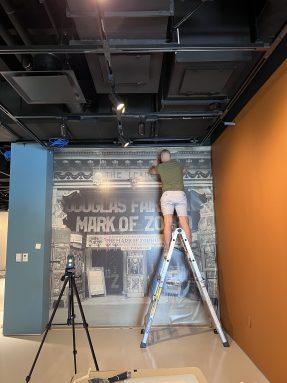
In process installation shots:


Upcoming Events
-
Confessions from the Security Vault
Event Date:Presented by: Southeastern Museums Conference -
From Fragmentation to Alignment: Project Management in Museums
Event Date:Presented by: American Alliance of Museums -
Unlocking Your Site’s Membership Potential
Event Date:Presented by: American Association for State and Local History (AASLH) -
CEO Chat: Censorship
Event Date:Presented by: American Alliance of Museums